Will This Attachment Fit My Mini Excavator?
Four numbers decide it, and none of them are the tonnage on the listing. This walks through what to measure, how to measure it, and what to do when your machine came with no paperwork and no name on the side. Read it before you order, not after the freight shows up.
01The Short Version
An attachment fits your mini excavator when four measurements line up: pin diameter, the distance between pin centers, the gap between the mounting ears, and the thickness of your dipper arm.
Miss any one of those and it does not go on. Not with persuasion, not with a bigger hammer.
The tonnage rating in the listing title will not save you either. Two machines that both weigh a ton can come out of different factories with completely different mounts.
That is the whole answer. The rest of this is how you get those four numbers off your own machine, what to do when nobody will tell you what they are, and the two extra things that bite you even when the pins line up perfectly.
02So What Actually Decides Whether It Fits?
The mount. That is it. Everything that pins or hangs off the end of your dipper arm connects through the same little joint, and that joint is machined to specific dimensions.
Here is the thing people get wrong. They look at a bucket and see a hunk of steel. Simple. How precise could it be?
But the connection end of that hunk of steel is cut to tolerances measured in millimeters, because it has to swing under load without slop. A joint with play in it wears itself out first, then wears out everything attached to it.
So when you ask whether an attachment fits, you are really asking four smaller questions about that joint.
Will the pins go through the holes? Are the holes the right distance apart? Will the attachment’s ears slide over my arm? And is my arm too thick or too thin for the space between them?
Answer those four and you know. Skip them and you are gambling a few hundred dollars plus a freight charge you will pay twice if it has to go back.
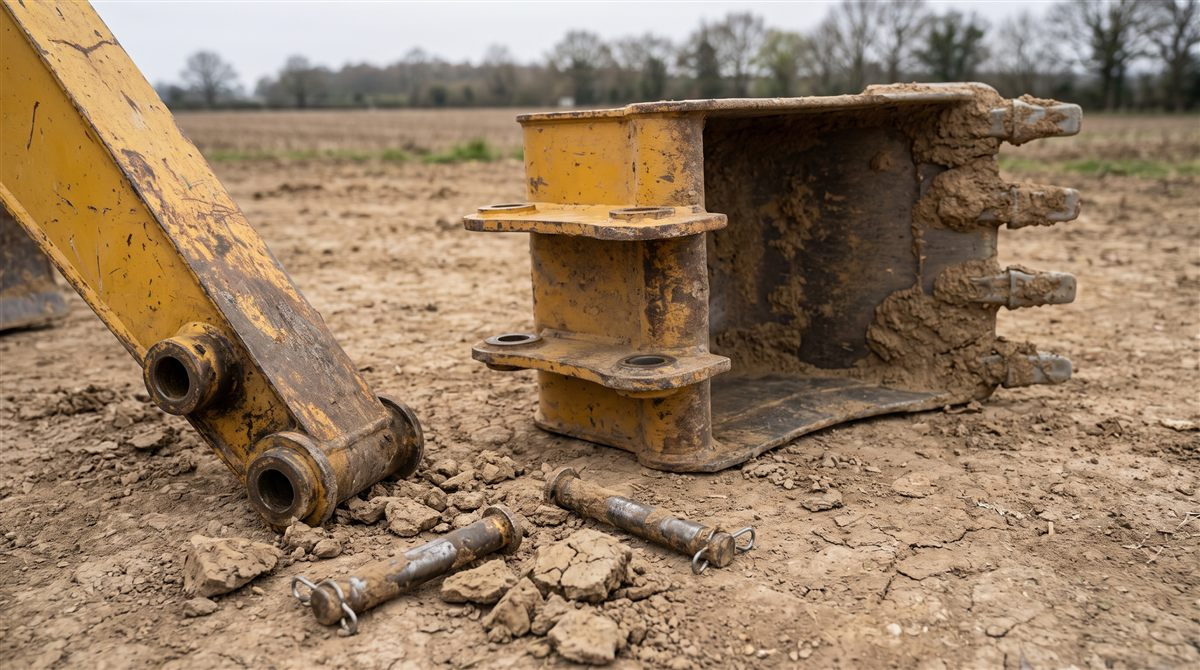
03The Four Numbers You Need
Write these down somewhere you will not lose them. Tape them inside the toolbox. You will use them every time you shop for anything that pins on.
Pin diameter. How fat the pins are. On mini excavators this usually runs between 25mm and 45mm, and the small imported machines most people are buying land at 25mm or 30mm far more often than anything else.
This one is absolute. A 30mm pin does not go through a 25mm hole, and a 25mm pin rattling around in a 30mm hole is a repair bill waiting to happen.
Pin center distance. The distance from the middle of the top pin hole to the middle of the bottom one.
This is the measurement that varies the most, and the one people forget to check. Both holes can be exactly the right diameter and the attachment still will not line up.
Ear width. The gap between the inside faces of the attachment’s two mounting ears. Your dipper arm has to slot into that gap.
Too narrow and it does not go on. Too wide and the attachment wanders side to side every time you load it.
Dipper arm thickness. The flip side of the last one. Measure the arm itself where the attachment sits.
You want it a touch narrower than the ear gap, so it slides in without fighting but does not flop around.
There is no such thing as a universal mini excavator attachment. When a listing says “fits 1 to 1.8 ton machines, dual 25mm pins, 90mm ear width, 150mm spacing,” that seller knows their product. When it just says “universal,” they are hoping you do not ask.
04How Do You Measure Them Without Guessing?
The easiest trick in the book: measure the bucket that came with the machine. It already fits. Its numbers are your numbers.
You do not need to pull anything apart. Set the bucket flat on the ground, curl the arm so the joint opens up, shut the machine off, and get in there with a tape and a set of calipers.
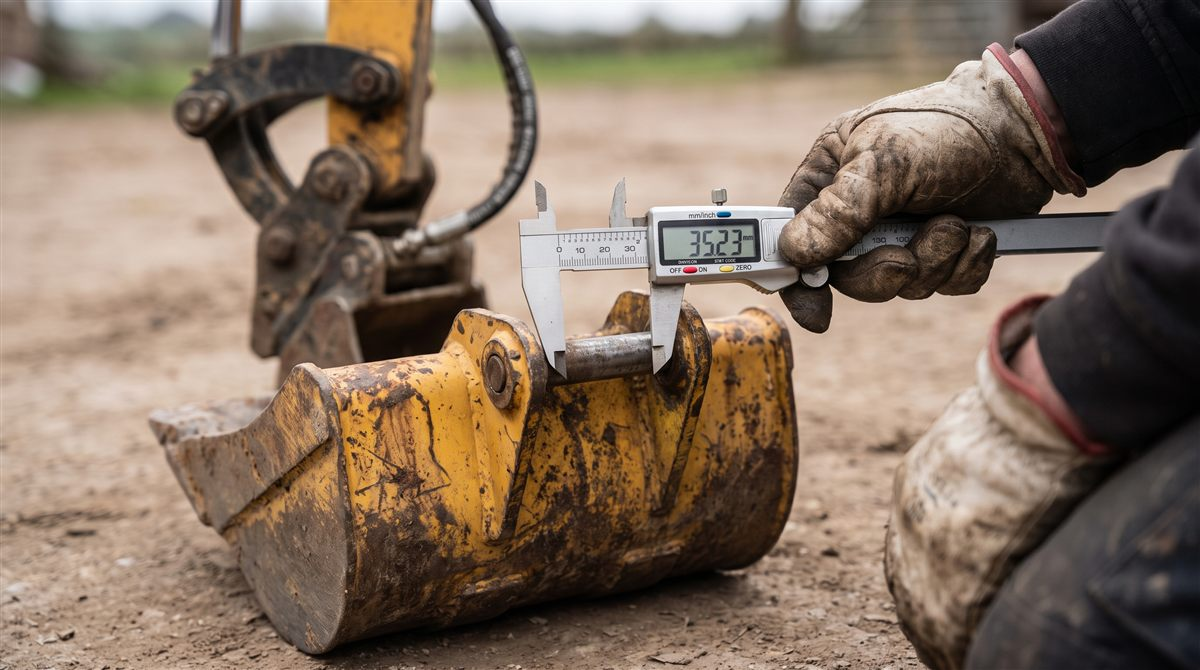
Pin diameter. Calipers are the only honest way here. A tape measure on a round pin reads low every time, because you cannot reliably find the widest point by eye — and on a 25mm pin, 2mm off is the whole ballgame.
A six-inch digital caliper that switches between inch, millimeter and fraction costs less than a tank of diesel and you will use it for as long as you own the machine. Measure the pin itself if you can get one out, or measure the hole in the bucket ear.
Do both if you are being careful. A worn pin measures smaller than the hole it came out of, and the difference tells you how much life is left in the joint.
Pin center distance. Hook your tape on the outside edge of one hole, read to the outside edge of the other, then subtract one pin diameter. Or measure inside edge to inside edge and add one.
Either way you land on center to center, which is what the seller’s spec sheet means. Eyeballing “about six inches” is how people end up with a bucket sitting in the barn.
Ear width and arm thickness. Put a ruler between the two ears of the existing bucket and read the gap. Then measure your dipper arm across its face at the mounting point.
Those two numbers together tell you how much clearance you actually have to work with.
Do it once, properly. Twenty minutes gives you four numbers you can paste into any listing question for the rest of the machine’s life. While you have the joint open, it is worth checking whether your pins and bushings have started to wear — the same calipers answer both questions in one trip outside.
05What If Your Machine Has No Model Number and No Spec Sheet?
Welcome to owning an imported mini excavator. This is the most common version of this question, and the answer is simple: stop hunting for paperwork.
A lot of these machines arrive with a vague data plate, a manual that was translated twice, and a seller who has already moved on to selling something else. Some have no brand name anywhere on the body.
The same machine gets sold under four different names with four different stickers. That is worth understanding properly if you ever need to track down parts for a machine with no real brand behind it.
But none of it matters for fitment. The steel does not care what the sticker says.
So do not spend an evening emailing a seller who will not answer. Go outside and run section four. Twenty minutes later you know more about your machine’s mount than the listing ever told you.
There is a side benefit, too. A lot of suppliers now organize their catalogs by pin size specifically because so many owners are in exactly your position.
Searching “30mm pin mini excavator auger” gets you further than searching whatever name is painted on the side.
06Does the Attachment’s Weight Matter as Much as the Pins?
Yes, and this is the part that catches people who did everything else right. An attachment can pin up perfectly and still be a bad idea.
Your machine has a rated lift capacity, and that number drops the further out the arm reaches. Hang something heavy on the end and you have spent part of your capacity before picking up a single thing.
A heavy grapple on a small machine will lift the back tracks off the ground when you reach out over the front. That is exactly as alarming as it sounds.
Manufacturers publish attachment weight for a reason. Compare it against what your machine is rated to handle at full reach — not tucked in close where the numbers look good.
Leave margin, too. The rated figure assumes level ground, and almost nobody is working on level ground.
This is not a comfort issue, it is a tipping issue. Federal rules covering material handling equipment on job sites exist because overloaded machines do predictable things, and none of them are good.
On your own property nobody is inspecting you, which means the only person enforcing the limit is you.
Rule of thumb that has never let anybody down: if you are at the top of what your machine can handle, buy the next size down. A slightly small attachment does the job slower. A slightly big one does the job until it does not.
07What About Attachments That Run on Hydraulics?
Then you have two more numbers to match, and these ruin attachments quietly rather than refusing to fit.
A bucket is dumb steel. A breaker, auger, brush cutter or thumb is a machine of its own, and it needs your excavator to feed it oil at a specific rate and pressure. Flow, in gallons per minute. Pressure, in PSI.
Here is what makes this different from the pin problem. Wrong pins and the thing will not go on, so you find out immediately.
Wrong flow and it bolts right up and runs badly. You spend a season thinking you bought a lemon, when really you bought an attachment your machine cannot feed.
Too little flow and it turns slow and stalls in anything hard. Too much and you cook seals.
So before you buy anything with a hose on it, find out what your auxiliary circuit actually puts out and check it against what the attachment asks for.
A lot of small imported machines have less auxiliary flow than people assume. That is the usual reason a hydraulic breaker disappoints somebody on a one-ton machine.
Same story with augers. The bit turns, it just does not turn with any authority, and what it really takes to run an auger properly off a mini excavator comes down to flow more than anything else.
Then there are the fittings. Most imported machines run metric, most attachments sold here assume something else, and the adapters are cheap — but you want to know which ones before the attachment is sitting in your driveway.
A thumb is usually the gentlest introduction to all of this, which is part of why a hydraulic thumb ends up being the first hydraulic attachment most people add.
08Metric or Inches — Which One Is Your Machine?
If it came from overseas, it is metric. All of it. Do not let a seller’s inch conversion do your thinking for you.
This sounds like a small thing. It is not. Conversions get rounded, and rounding is exactly what kills you at these tolerances.
A 25mm pin is 0.9843 inches. Somebody writes “1 inch” in a listing because it is close enough for conversation.
It is not close enough for a pin hole. That is 0.4mm on paper and a sloppy joint in real life, and it compounds when the ear spacing gets rounded the same way.
So work in millimeters only. If a listing gives you inches, convert it back yourself and see whether it lands on a sensible round number like 25, 30, 35 or 40.
If it converts to 25.4 and your machine is 25, that is not the same pin. No matter how close it looks written down.
09What Do You Do When It Almost Fits?
Depends entirely on which number is off. Some of these are a twenty-minute fix. One of them means send it back.
Ear gap slightly too wide. That is the easy one. Shim washers on the pins take up the slack and the joint tightens right up.
People do this constantly and it works fine, as long as you are talking a few millimeters and not a half inch.
Pin holes slightly too small. These can sometimes be opened up with a proper drill press and the right bit. Owners do it. It works.
But understand what you are doing. You are machining a load-bearing hole by hand, and if it comes out oversized or off-center you have created the exact slop you were trying to avoid. This is not a job for a hand drill and optimism.
Pins too big for your machine. Usually fine, because you swap the pins rather than the attachment. Replacement pins are cheap and sold by diameter.
If you are on 25mm, a two-pack of 25mm pins cut for imported mini excavators is worth keeping on the shelf anyway. On 30mm, a 30mm by 200mm bucket pin covers most of the common small machines.
Either way, check the length as well as the diameter. A pin that is correct across but too short does not carry properly through both ears.
Pin center distance wrong. Send it back. There is no shim, no drill, no clever fix.
The geometry is wrong, and nothing short of cutting and rewelding the ears changes it. At that point you have made a structural modification to the part holding everything up. Do not do it. Eat the return shipping and buy the right one.
Before you modify anything: a great many “it almost fits” problems turn out to be measurement errors. Measure it again, in millimeters, with calipers, before you take a drill to a part that holds a bucket over your feet.
10What Should You Ask the Seller Before You Buy?
Three questions. If the seller cannot answer all three in plain numbers, buy from somebody else.
One: what is the pin diameter, the pin center distance, and the ear width, in millimeters?
Not the tonnage range. The actual dimensions. A seller who stocks the part reads them off a sheet in ten seconds. A seller drop-shipping a listing they have never touched will give you the tonnage again, or go quiet.
Two, if it runs on oil: what flow and pressure does it need to work properly?
Note the wording. Not the minimum it will limp along at. What it needs to do the job you are buying it for.
Three: what is the return policy if the dimensions do not match what you just told me?
This one is the tell. A seller confident in their numbers answers it easily. A seller who starts explaining why returns are complicated has told you everything you need to know.
That is the same instinct that works everywhere else with these machines. You are not really asking about the attachment — you are finding out whether there is a real operation behind the listing or just a photo and a shipping label.
The full rundown of which attachments are worth owning in the first place goes deeper on where each one earns its keep. And if you are still choosing a machine, getting the size right before you buy saves you this entire conversation later.
11Questions People Ask After Reading This
The ones that come up once the measuring is done and the shopping starts.
Can I buy a quick coupler and stop worrying about all this?
Partly. A coupler standardizes the connection so several attachments share one mount, which is genuinely convenient if you swap often.
But the coupler itself still has to fit your machine. You do this measuring exercise once to buy the coupler, and after that your attachments match the coupler instead of the arm.
The good ones publish the pin size right in the listing — a 25mm quick coupler built for 0.8 to 2 ton machines tells you what it fits before you ask, which is the behaviour you want from a seller.
Worth knowing: a coupler adds a few inches of reach and some weight out at the end, which loops straight back to the capacity question in section six.
How much play in the joint is too much?
If you can see the attachment move independently of the arm when you curl it, that is too much.
A correct joint feels tight, with just enough clearance to move freely. Slop gets worse fast, because every hour of work wears the hole a little bigger.
Do I need to take the bucket off to measure?
Usually not. Curl the arm to open the joint, shut the machine down, and you can reach the pin ends and the ear gap well enough for all four numbers.
Only pull it apart if you are also checking for wear.
What if the attachment came with no dimensions at all?
Ask once, using the three questions above. If you get tonnage back instead of millimeters, you have your answer about that seller — and it is not really about the attachment any more.
Now Pick the Right Attachment
Thumbs, augers, grapples, breakers, brush cutters and buckets — what each one is actually good for, and which ones make sense on a small machine.